How to Upload
Getting your GPX file onto Strava is a straightforward process that begins with opening Strava.com in your browser and logging into your account.
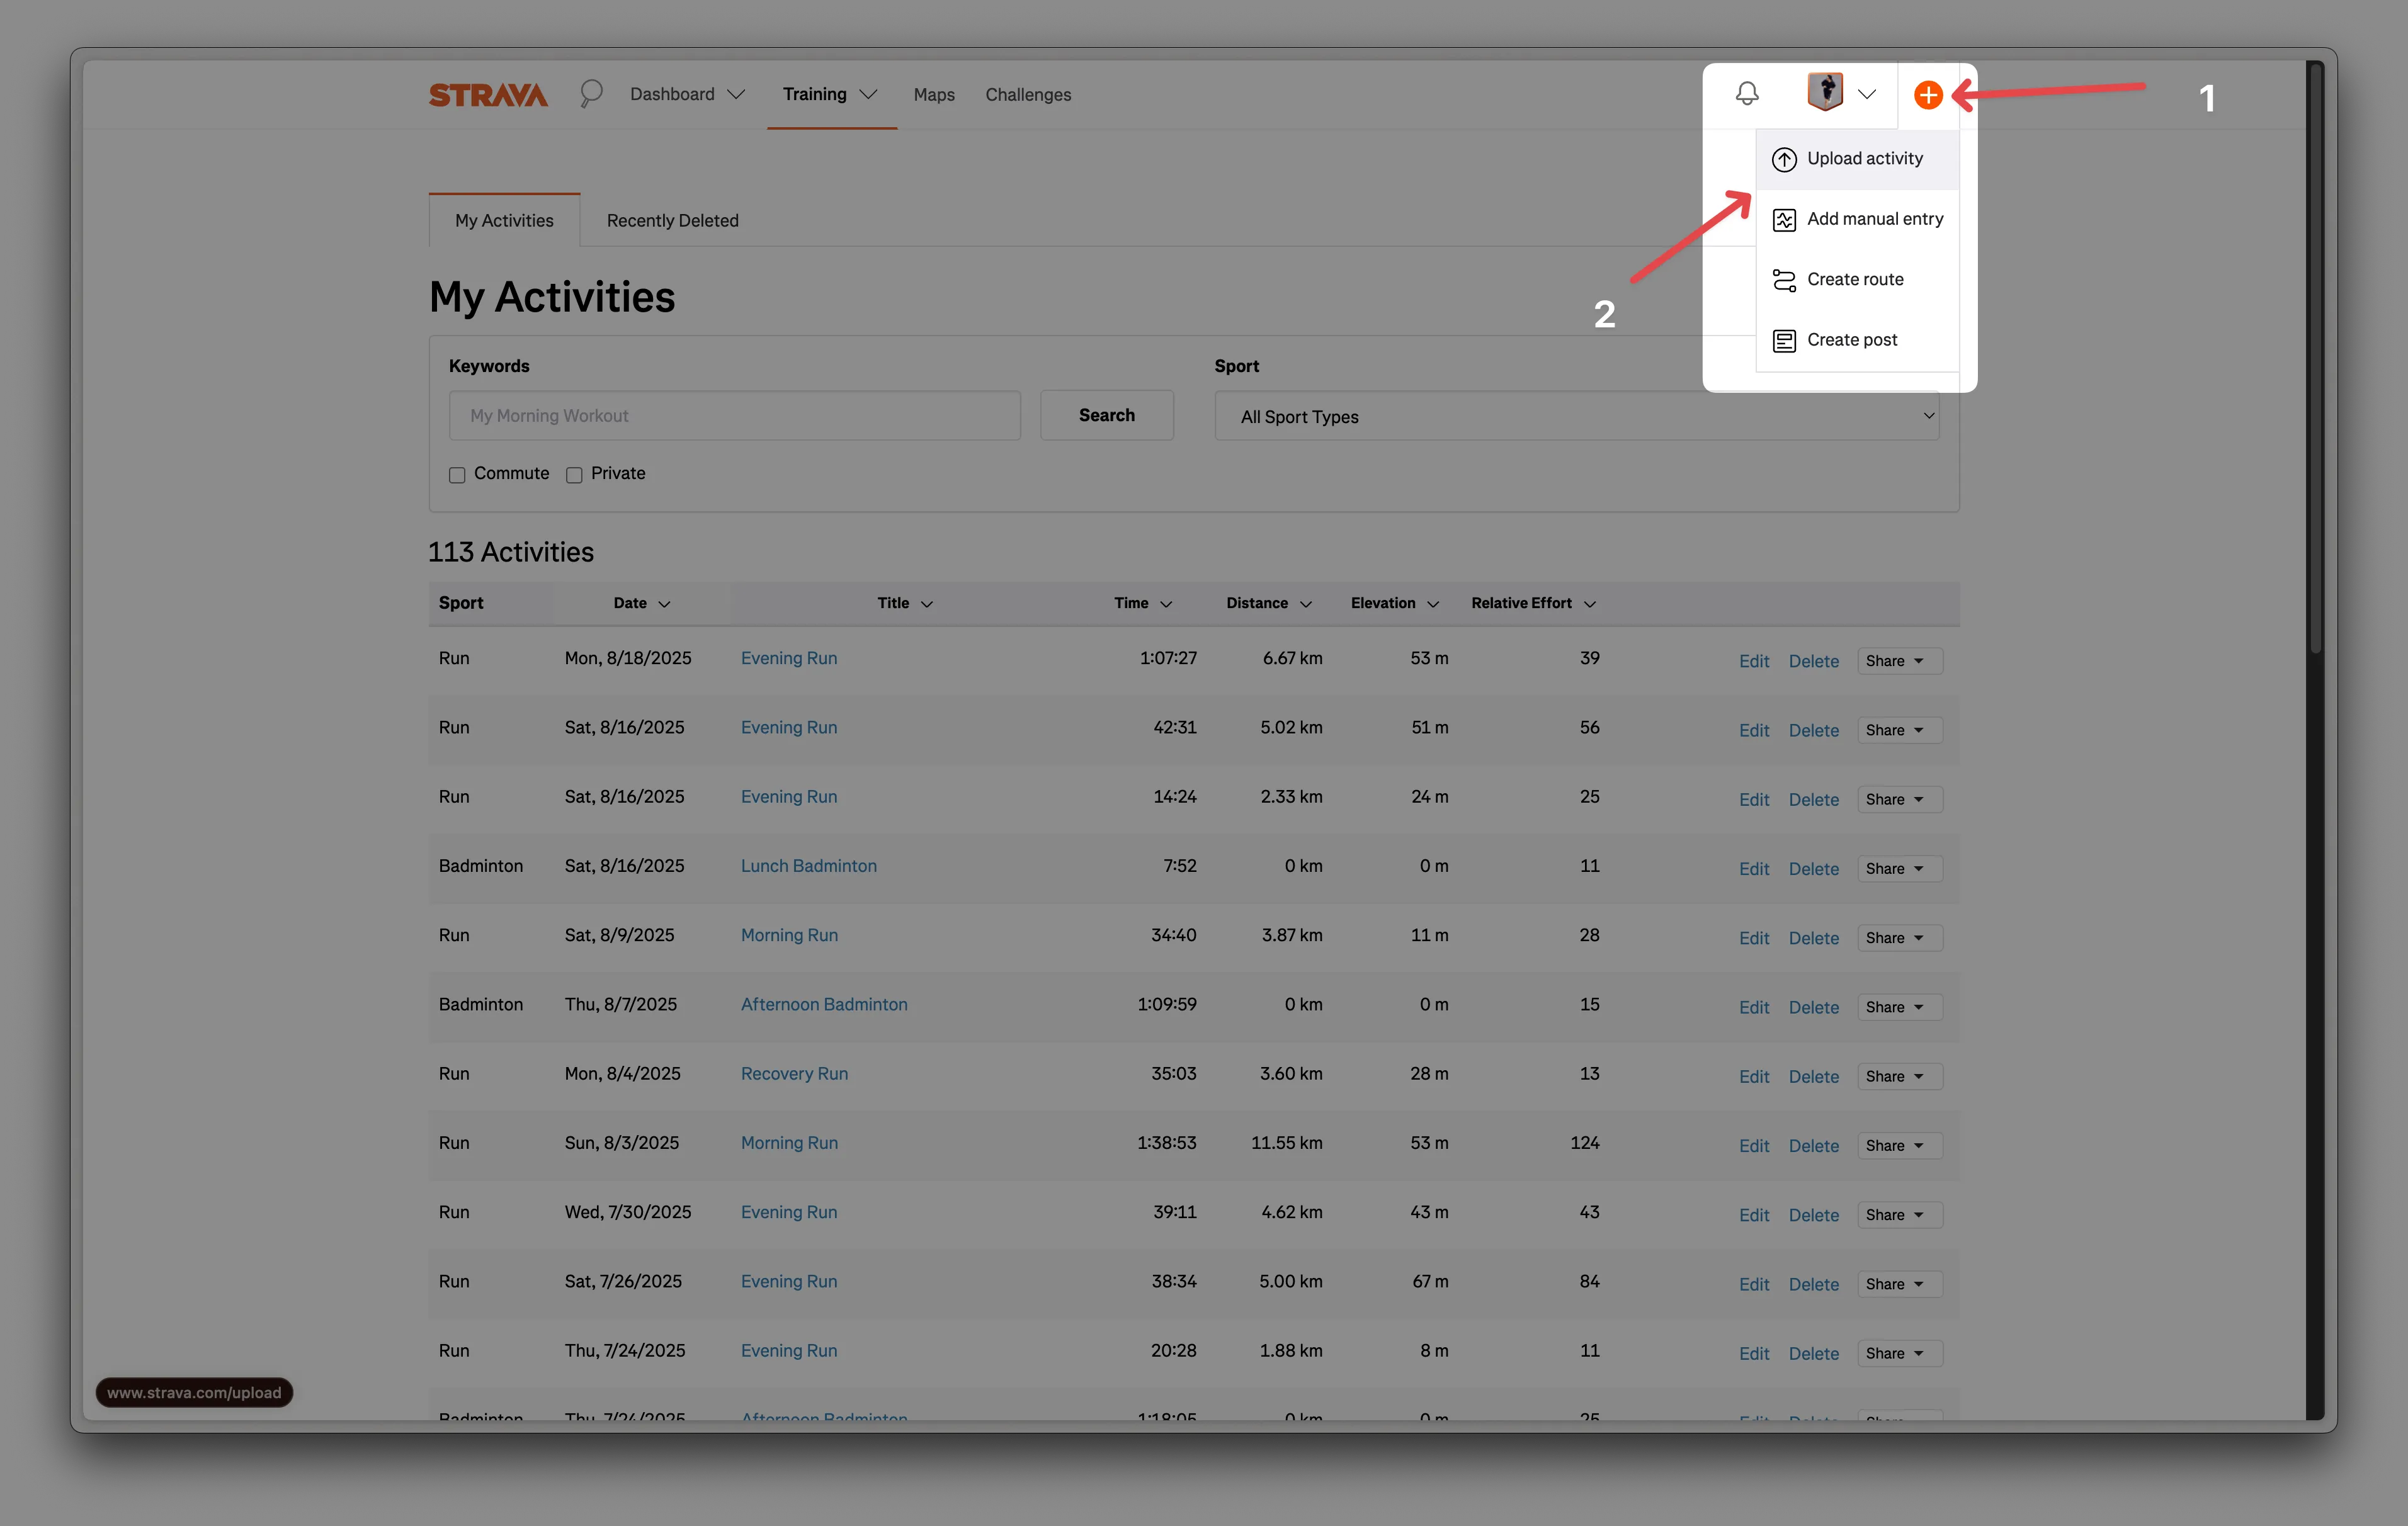
Once you're logged in, you'll notice a "+" (plus) icon in the top right corner of the page. Clicking this will open a menu where you can select "Upload Activity" to begin the process of adding your new workout to your profile.
The upload interface will present you with several options on the left-hand side. You'll want to choose "File" from this menu, which will allow you to upload your GPX file directly from your computer.
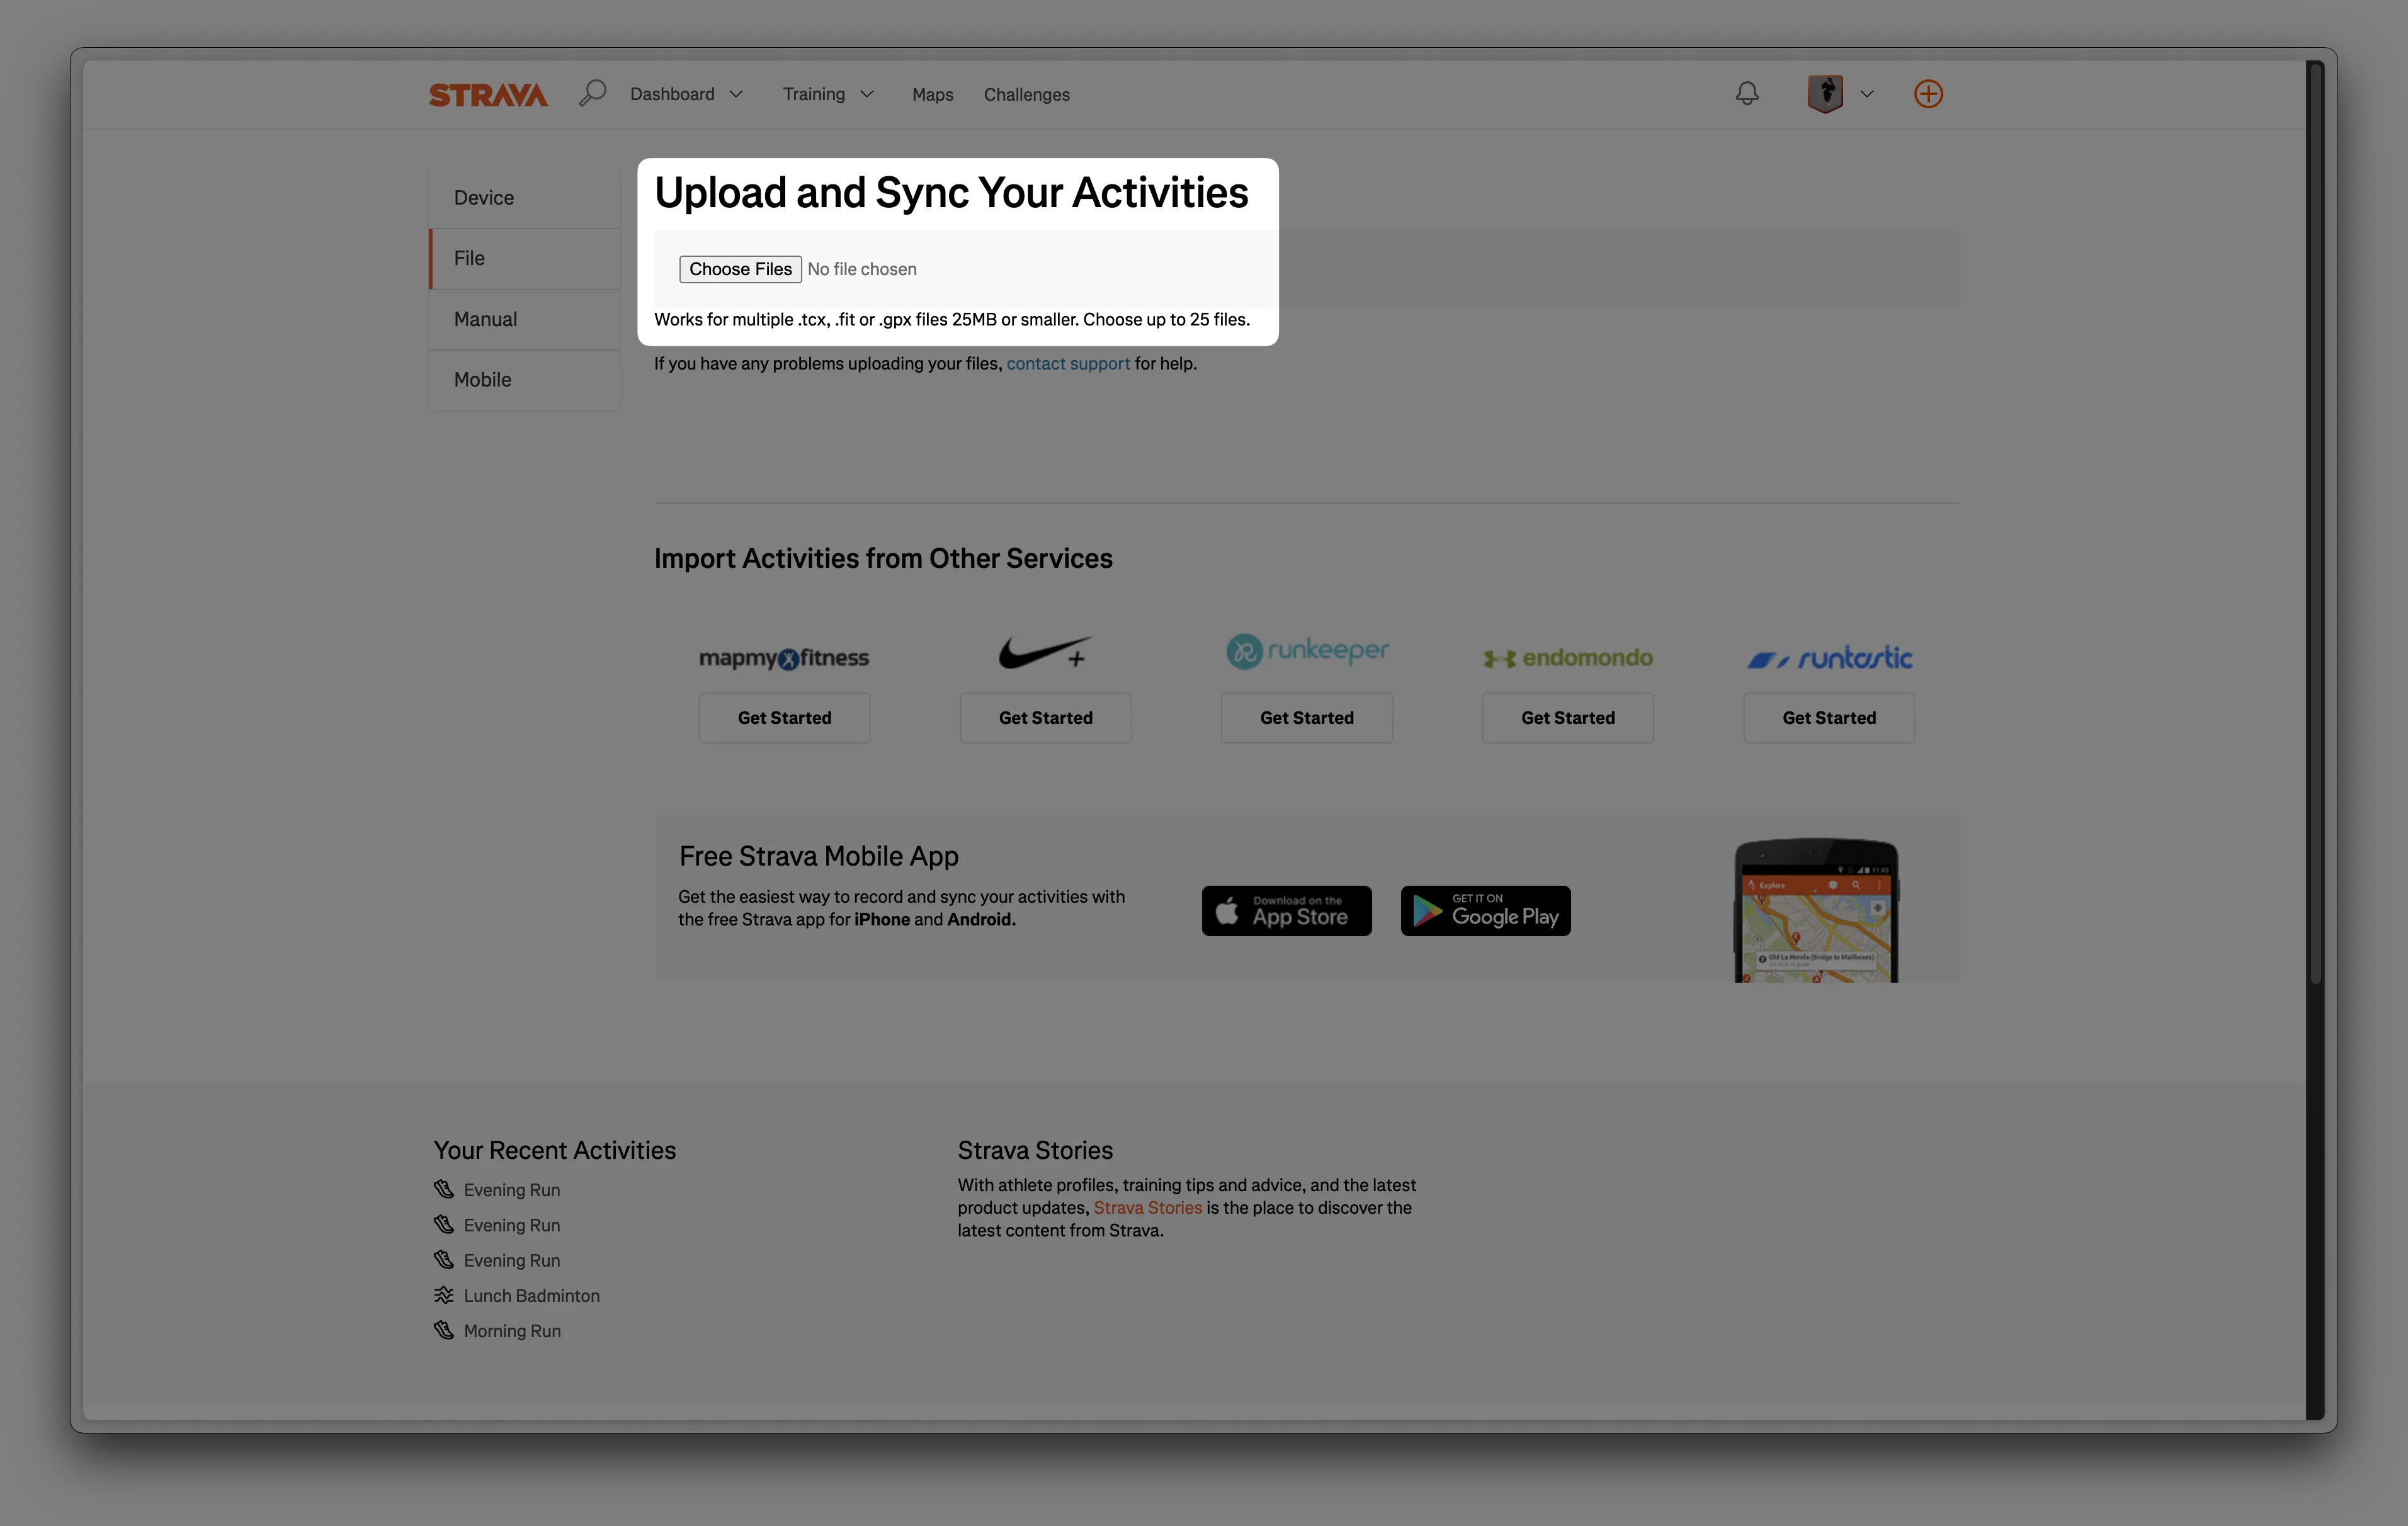
When you click "Choose Files," your computer's file browser will open, allowing you to navigate to and select the GPX file you've created. Once selected, Strava will automatically begin processing your file and generate a preview of your activity, complete with the route map and basic statistics.
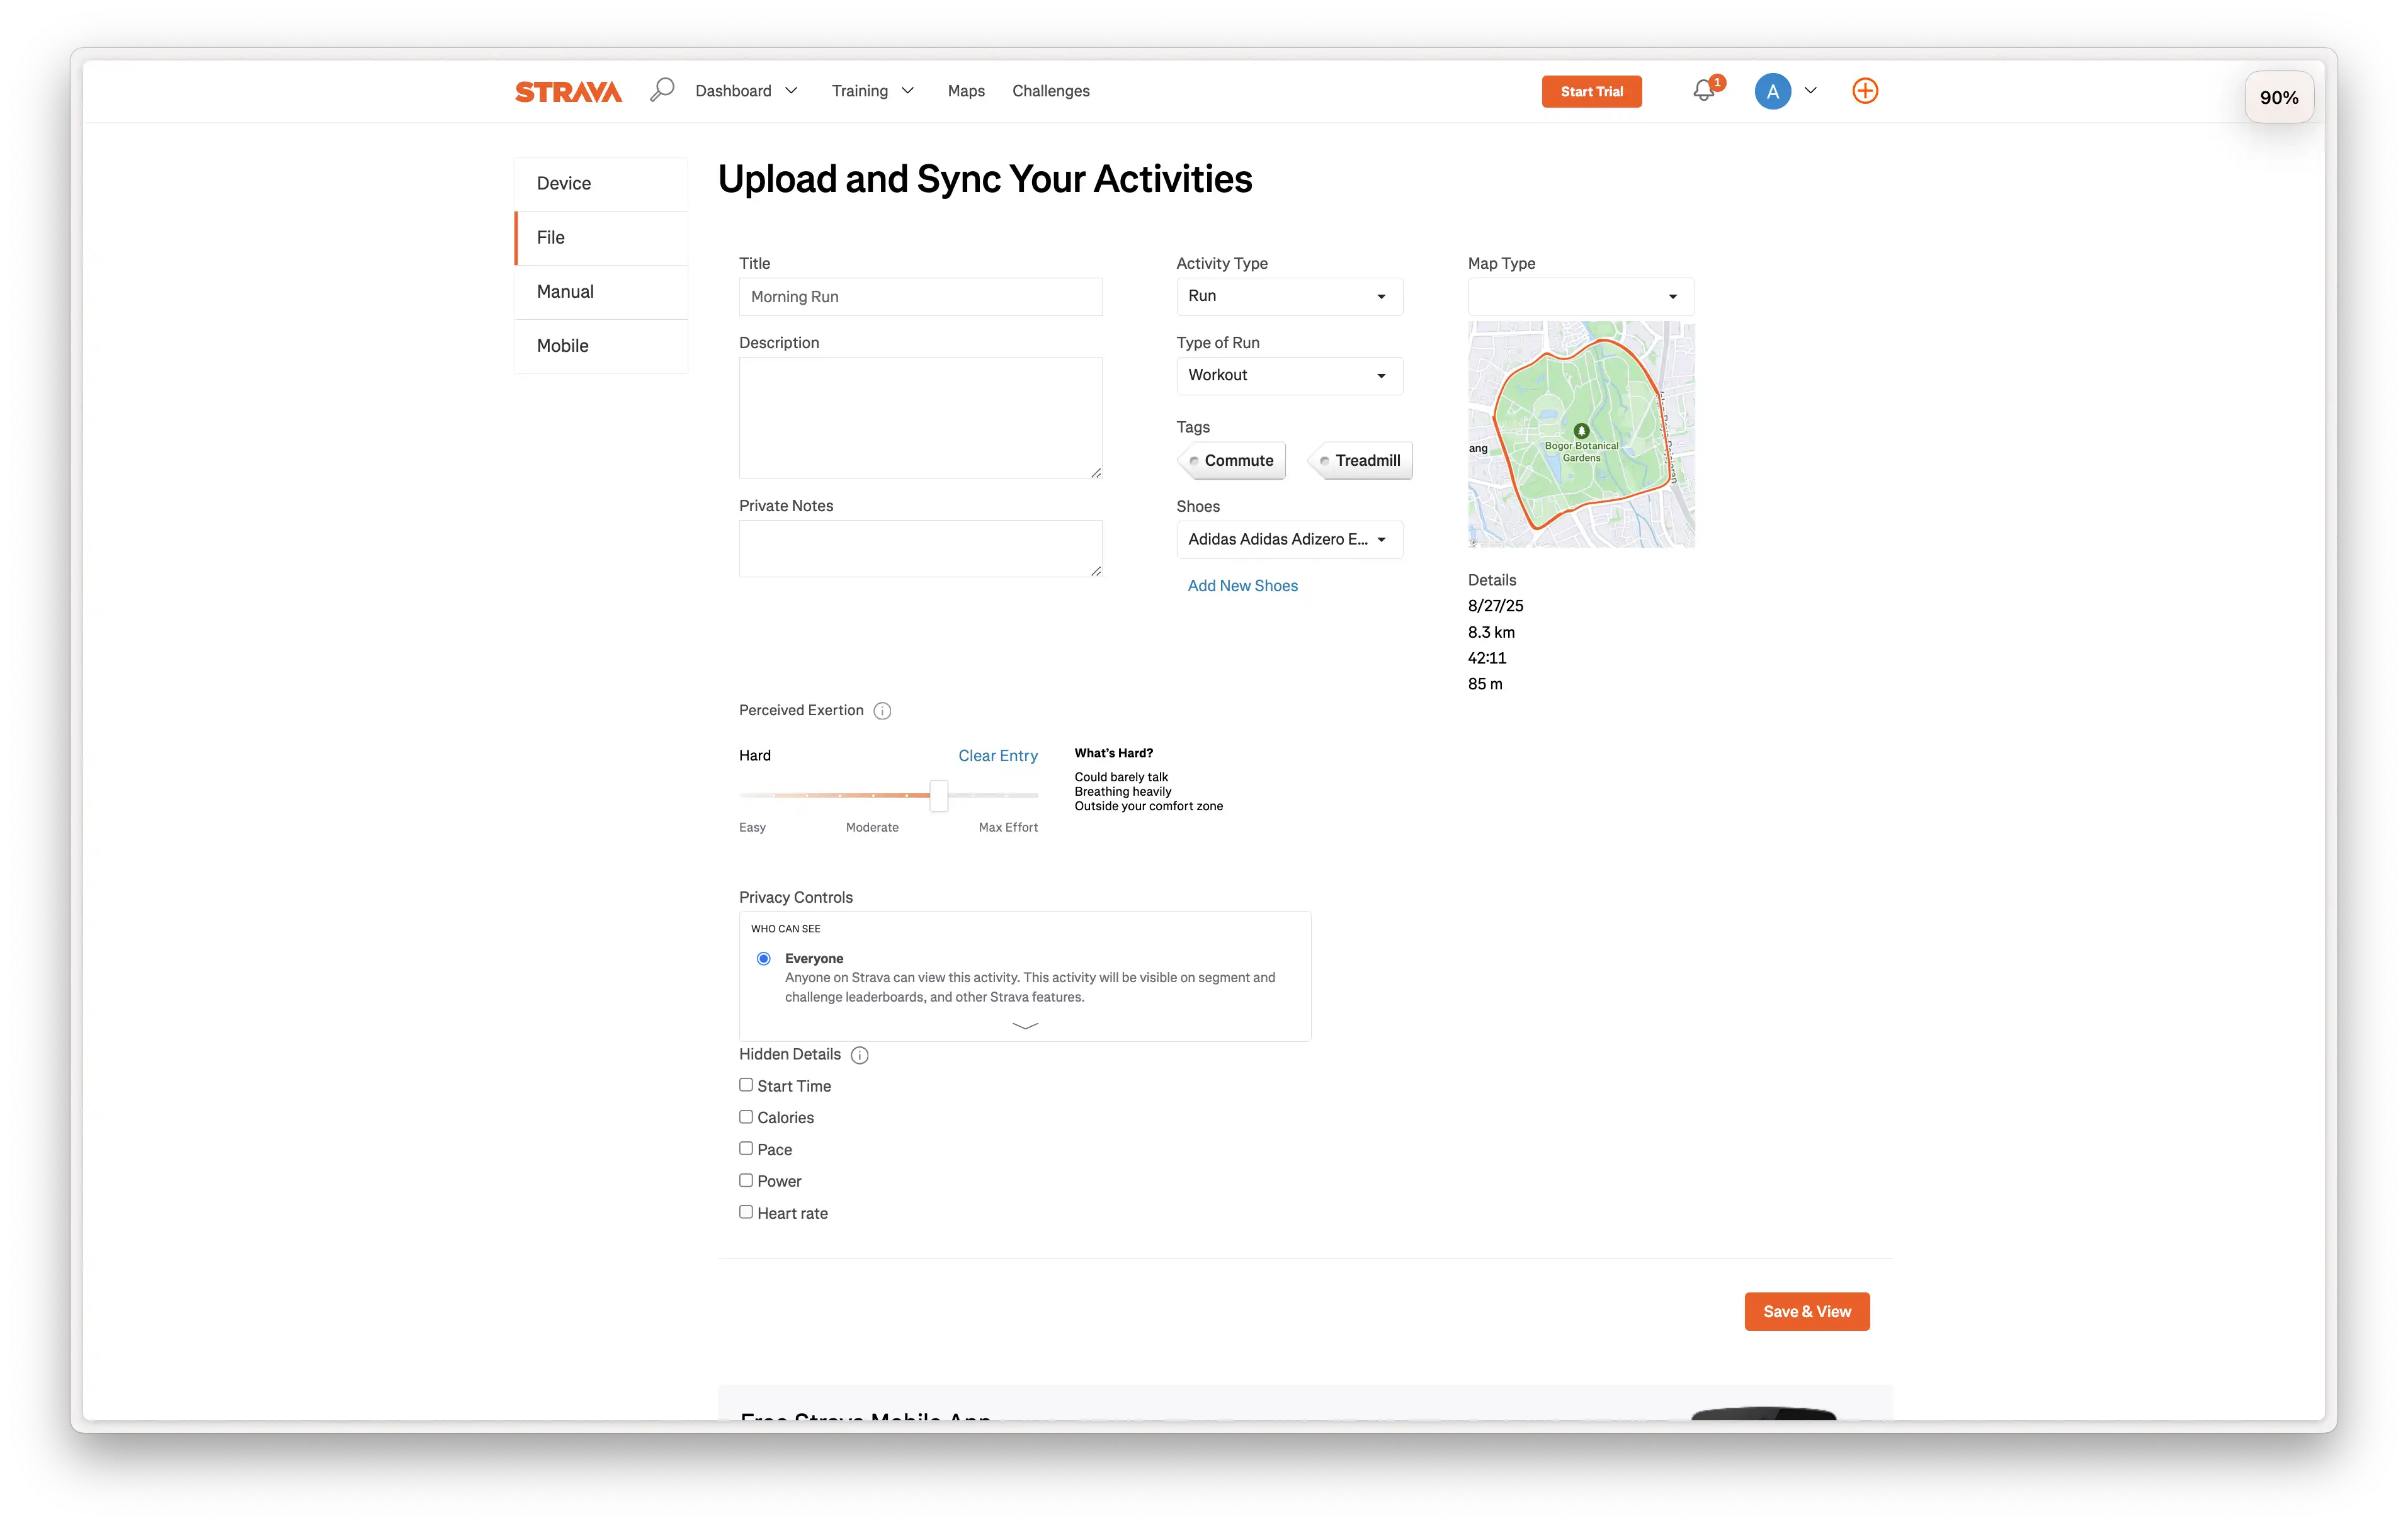
Before finalizing your upload, you'll have the opportunity to customize various details about your activity. This includes editing the title, selecting the correct activity type (running, cycling, etc.), adjusting privacy settings, and adding any additional notes or descriptions. Once you're satisfied with all the details, simply click "Save & View" to complete the upload and view your newly added activity.